This was originally published in the November edition of Appliness digital magazine.
Remember the very first web sites we created? It was just bunch of HTML files that we uploaded to a remote host using our favorite FTP program. It was all static and it just worked. Yet it was boring. Visitors wanted sites that surprised them every time they hit refresh. Moreover, we also got tired by the slow and cumbersome process we had to follow every time to update the site. Editing content within a HTML tag soup was a chaos. We broke the sites because we forgot to close some nested tag.
Along with the popularity of the LAMP (Linux, Apache, MySQL and PHP) stack, came the Content Management Systems. They seemed to be the right way to manage a web site and it didn't take long to become the de facto. CMSs allowed us to separate the content from the presentation and update our sites with just couple of mouse clicks. Anyone could run a site, even without knowing HTML.
However, as our sites grow and starts attracting more traffic, we see the shortcomings of CMSs. They become slow because they render the pages for each request. You need to tune the database and servers to handle the load. To add a trivial new feature to the site you need to modify the internals of the CMS (which is often a spaghetti code). Further,they are full of vulnerabilities. Remember the day your site got hacked, because you missed one of those daily security updates? Managing a web site seems to take up your life and become a chore.
On times like this, we start to feel nostalgic about the static web sites we created. "It was just bunch of HTML files. But it worked!".
This inspired me to write Punch, which brings back the simplicity of static web, along with the conveniences of content management. There's no server-side code to run, no databases to configure, no mix up between HTML and the content. You can resort to your favorite tools to create the site locally, preview it in the browser and finally publish the changes to any remote host using a simple command-line interface.
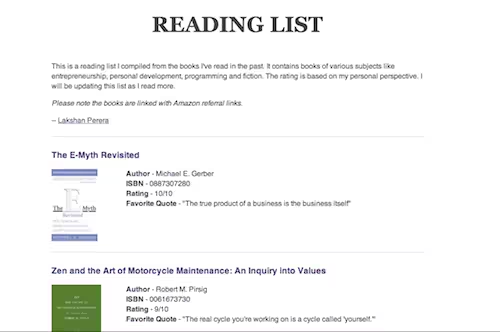
It's better to understand the concepts of Punch with a simple real-life example. Let's create a site using Punch to share your favorite books with others. We shall call this project as the "Reading List".
If you are in a hurry, you can check the final result from here and download the source code from GitHub.
Installing Punch
Before we start the tutorial, let's install Punch. To run Punch you will need Node.js. Make sure you have installed Node.js (version 0.8+) on your machine. Then open up your Terminal and type:
npm install -g punch
This will install Punch as a global package, allowing you to use it as a shell command. Enter the command punch -v to check whether Punch was installed properly. This tutorial was created using Punch version 0.4.17.
Setup a New Site
Let's spin off a new project for our Reading List. By running the command punch setup, you can create the project structure with essential files.
punch setup reading_list
This will create a directory named reading_list. Inside it we will see another two directories named templates and contents. Also, you will find a file named config.json. You will learn the purpose and role of these directories and files as the tutorial progress.
While we are inside the project directory, let's start the Punch server by running the command:
punch s
This will allow us to preview the site we create in real-time. By default, the server starts on the port 9009.
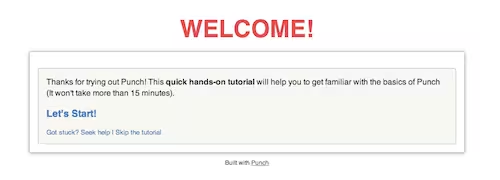
Open your browser and enter the URL http://localhost:9009. You should see the welcome screen along with a link to a quick hands-on tutorial. I highly recommend you to take couple of minutes to go through this quick tutorial first, which will help you to grasp the core concepts of Punch. I'll wait till you finish it.

Preparing the Layout
In the quick hands-on tutorial, you learnt Punch uses Mustache as the default templating language. Also, you learnt the layouts, partials and static assets that composes a site's user interface must be saved inside the templates directory.
Make sure you removed the {{{first_run}}} from the templates/_footer.mustache to get a clean view sans the hands-on tutorial.
Now let's turn our focus back to the Reading List page we are creating. It should contain the following information:
- Introduction
- List of Books (we must provide the following information for each book)
- Title
- Cover image
- Author
- ISBN
- Your rating
- Favorite quote from the book
- Link to the book in Amazon
We only need to create a single web page to show these information. So we can directly customize the default layout (templates/_layout.mustache) to create the view we need.
{{> header }}

        <div role="main">
            <p>{{{intro}}}</p>
            <div id="books">
                {{#books_list}}
                    <div class="book">
                        <h3><a href="{{amazon_link}}">{{{title}}}</a></h3>
                        <div class="cover">
                            <a href="{{amazon_link}}"><img src="{{cover_image}}"></a>
                        </div>
                        <ul>
                            <li><b>Author</b> - {{author}}</li>
                            <li><b>ISBN</b> - {{isbn}}</li>
                            <li><b>Rating</b> - {{rating}}</li>
                            <li><b>Favorite Quote</b> - {{{favorite_quote}}}</li>
                        </ul>
                    </div>
                {{/books_list}}
            </div>
        </div>

{{> footer }}
Note that some Mustache tags are surrounded with three curly-braces, while others are surrounded with two curly-braces. By having three curly-braces we say Mustache not to escape the HTML within the content. In places where you want to have HTML formatted content, you must use the tags with three curly-braces.
After modifying the layout, refresh the page in the browser to see the changes.
Creating the Reading List in JSON
Still you won't see any visual difference in the page. But if you view the source of the page, you will see the HTML structure you defined with empty values in the places where there were Mustache tags. We must provide content to render into those tags.
Let's start with the most essential piece of content of the page - list of books. Open the contents/index.json and start entering the details of your favorite books in the following format.
{
    "book_list": [
        {
            "title": "The E-Myth Revisited",
            "amazon_link": "http://www.amazon.com/gp/product/0887307280",
            "cover_image": "http://ecx.images-amazon.com/images/I/41ieA7d6CYL._SL160_.jpg",
            "author": "Michael E. Gerber",
            "isbn": "0887307280",
            "rating": "10/10",
            "favorite_quote": "\"The true product of a business is the business itself\""
        }
    ]
}
We've defined a JSON array named book_list which contains multiple book objects. For each book object, we define the required details as properties.
Save the file after entering the books and refresh the browser. You should now see the book list you just created rendered into the page as HTML.
You can continue to add more books or update the existing entries in the contents/index.json. The page will be rendered every time you make a change in the content.
Writing the Introduction Text using Markdown
So now we have listed our favorite books, let's add a simple introduction to the page. Rather than defining it as a JSON string, you can use Markdown formatting to write this piece.
When fetching contents for a page, Punch will look for extended contents such as Markdown formatted texts, in a directory by the name of the page prefixed with an underscore. This directory must be placed inside the contents directory along with the JSON file for the page.
In this instance, we should create a directory named _index and save our introduction inside it as intro.markdown. The filename of an extended content should be the tag name you wish to use in the templates to retrieve that content.
Changing the Site's Title
You will notice site's title is still displayed as "Welcome". Let's change that too. Site-wide content such as the site's title, navigation items are defined in the contents/shared.json file. Open it and change the site's title to "Reading List".
Styling with LESS
Now we are done preparing the content, let's do some style changes to beautify the page. You can use LESS to write the styles and Punch will automatically convert them into regular CSS.
As I mentioned previously, all static assets such as stylesheets, JavaScript files and images must be stored in the templates directory. You can organize them in any way you like inside the templates directory.
You will find the default site specific styles in templates/css/site.less. Let's change them to achieve the design we want for Reading List. To keep this tutorial concise, I won't show the modified stylesheet here. You can check it from the project's repo on GitHub:
Similar to processing the LESS files, Punch can also pre-compile CoffeeScript files into JavaScript automatically.
Minifying and Bundling CSS/JavaScript Assets
Minifying and bundling of CSS & JavaScript assets are recommended performance optimizations for all kinds of web sites. Those help to reduce the number of round-trips browsers needs to make in order to fetch the required assets and also minimizes the size of the assets that needs to be downloaded.
Minifying and bundling assets in a Punch based project is fairly straightforward. You only have to define your bundles inside the config.json. Then Punch will prepare and serve the minified bundles at the time of generating the site.
We can bundle the CSS files used in the project like this:
"bundles": {
    "/css/all.css": [
        "/css/normalize.css",
        "/css/main.css",
        "/css/site.less"
    ]
}
Then, you can use Punch's bundle helper tags to call defined bundles inside the templates.
<head>
    <!-- snip -->
    {{#stylesheet_bundle}}/css/all.css{{/stylesheet_bundle}}
</head>
This will produce a fingerprinted stylesheet tag (useful for caching) like this:
<head>
        <!-- snip -->
        <link rel="stylesheet" type="text/css" media="screen" href="/css/all-1351313179000.css">
</head>
Similar to stylesheet_bundle tag, there's a javascript_bundle tag which you can use to call JavaScript bundles from a page.
Publishing to S3
Our Reading List page is now almost complete.

Let's share it with others by publishing on the web. Punch allows you to either publish your site directly to Amazon S3 or upload it to a preferred host using SFTP.
In this tutorial, we will publish the site to Amazon S3. You will have to signup with Amazon Web Services and enable the S3 storage service for your account. Then, create a S3 bucket and a user who has access to bucket.
Enter those settings in the config.json file of your Punch project under the section name publish.
    "publish" : {
        "strategy" : "s3",
        "options" : {
            "bucket" : "BUCKET",
            "key" : "KEY",
            "secret" : "SECRET",
            "x-amz-acl": "public-read"
        }
    }
Then on the terminal, run the following command:
punch p
This will publish the Reading List site you just created to S3. Point your browser to the URL of your S3 bucket and you should see the site.
You can check the sample site I created by visiting this URL: http://readlist.s3-website-us-east-1.amazonaws.com
In future, if you want to add a new book or update an existing entry, all you need to do is edit the list in contents/index.json and then run the command publish p. It will publish only the modified files from the last update.
Extending Punch
In this tutorial, I covered the basic workflow for creating and publishing a site with Punch. You can easily extend and customize it further based on your requirement.
For example, you can implement your own content handler to enable sorting of the book list by different criteria. Also, if you prefer to use a different templating language than Mustache, you can write your own template engine wrapper to Punch (check out the implementation of Handlebars engine).
If you're interested in learning more about the available features in Punch and how to extend them, you can refer the Punch Guide.